terraform plan command — it will show what changes you are going to make to the CDN settings.
4. Run the terraform apply command to make changes to the CDN.
For detailed guidelines on how to create and manage CDN resources and resource options, check out the following sections.
Create a new CDN resource
Use the following steps to create a CDN resource and integrate it with your websites (content sources).Step 1. Open the configuration file
Open the main.tf file where you configured the Gcore provider for Terraform.Step 2. Create an origin group
At this step, you need to write the code that creates an origin group — the CDN resource will pull content from those origins. An origin group has three features:- You choose which origin will be active and which origin will be backup. An active origin is accessed whenever the CDN requests content. A backup origin is accessed only when active origins return 4xx or 5xx error. A group must have at least one active origin.
- You can enable or disable the “Use next upstream” option. It defines the order in which the CDN will access the remaining origins if the first origin returns a 4xx or 5xx error. If this option is on, the CDN will access active origins one by one, and then request backup origins. If it is off, the CDN will ignore the remaining active origins and will immediately request a backup origin.
- You can create a group from a single origin. It must consist of an active origin. The “Use next upstream” option should be disabled.
-
To enable the Use next upstream option:
use_next = true -
To disable the Use next upstream option:
use_next = false - To add an active origin, add the following code. Specify your website domain and remove the brackets.
- To add a backup origin, add the following code. Specify your website domain and remove the brackets.
- example_terraform — name of the origin group that will be displayed in Terraform
- example group — the name of the origin group that will be displayed in the Gcore Customer Portal
- The Use next upstream option is disabled
- one.com and two.com — the active origins
- three.com — the backup origin
Step 3. Add a CDN resource to your origin group
At this step, you will write the code that adds a CDN resource to your origin group. Continue to add the following code to the same configuration file. 1. Copy the code, replace the information in brackets with your values, and then remove the brackets.-
To configure the CDN so that it will access an origin on a protocol of a user’s request — HTTP or HTTPS:
origin_protocol = "MATCH" -
Enable CDN to use only HTTP:
origin_protocol = "HTTP" -
Enable CDN to use only HTTPS:
origin_protocol = "HTTPS" - To deliver different types of content from two separate custom domains:
- To deliver different types of content from more than two separate custom domains:
- cdn_example_com — name of the resource that will be displayed in Terraform
- сdn.one.com — custom domain of the CDN resource that will be displayed in the file paths and in the Gcore Customer Portal
- example_terraform — name of the origin group that will be displayed in Terraform
- HTTPS — protocol that will be used by the CDN to access an origin
- cdn.two.com and cdn.three.com — additional custom domains
Step 4. Verify the configuration
At Step 2 and Step 3, you entered the code that has created an origin group and a CDN resource. Below is an example of how your code may look in your configuration file: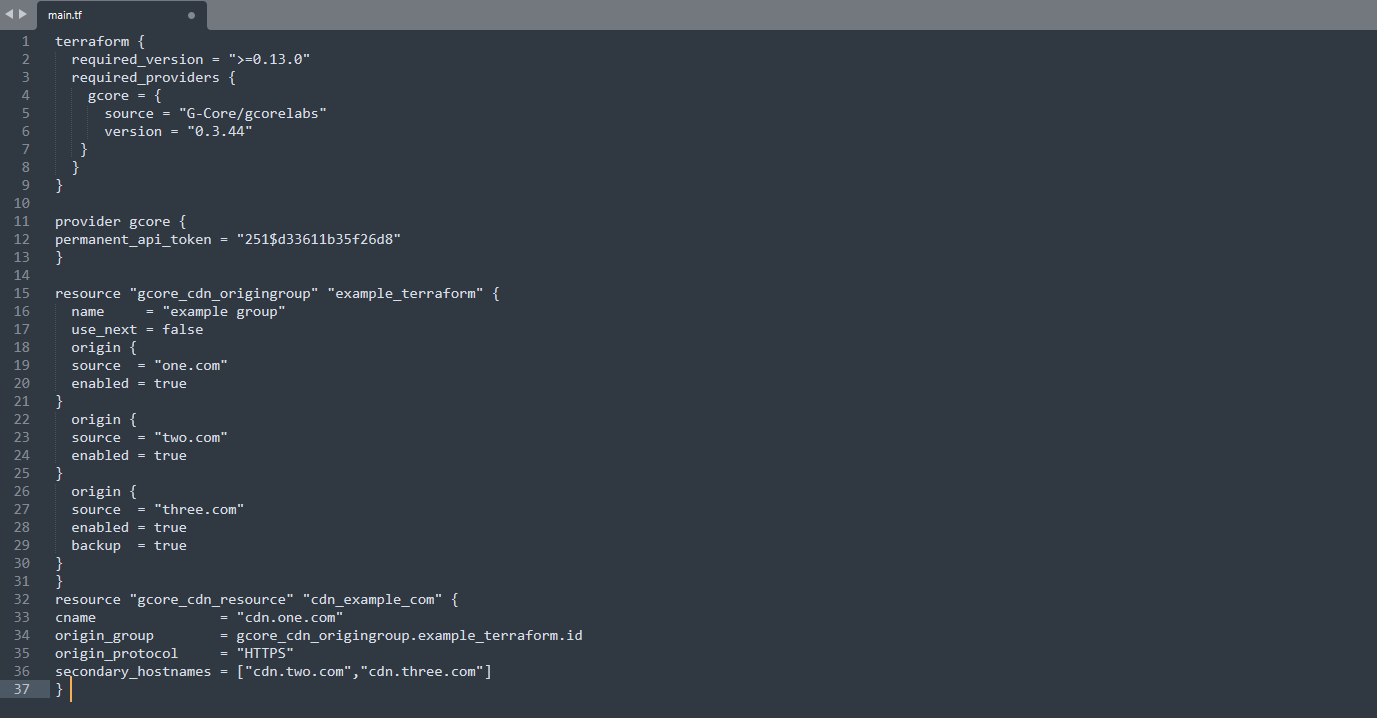
Step 5. Preview your changes
Open the “Terraform” folder in command-line interface and run theterraform plan command — it will show what changes Terraform is going to make. If the code in the configuration file contains an error, the output will give a brief description of it.
Step 6. Apply the configuration
Run theterraform apply command — it will make changes to the CDN. Terraform will ask you to confirm the action — enter “yes”.
Congratulations! The origin group and CDN resource have been created!
Now you need to configure a custom domain for the CDN resource and change the file paths so that they contain the custom domain instead of the origin domain. Use the following section for detailed instructions.
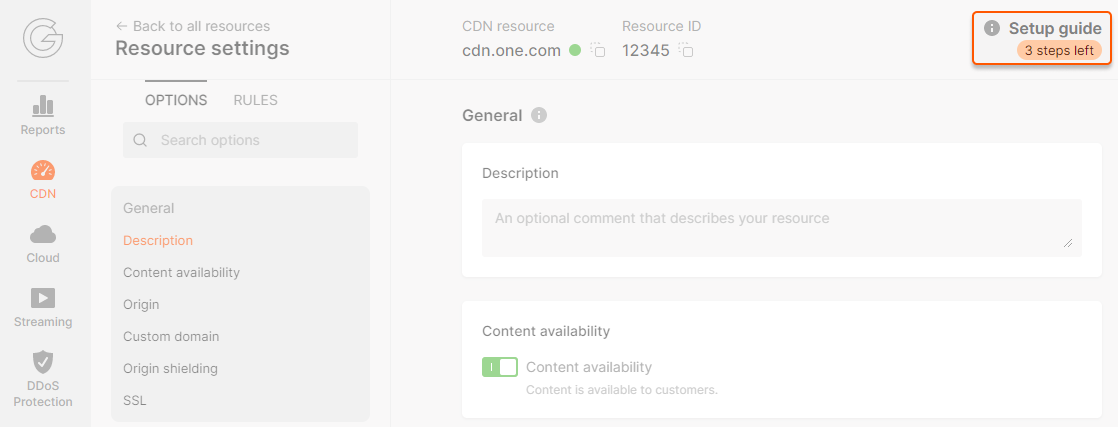
Step 7. Configure CDN resource in the customer portal
1. Log in to your Gcore account, go to the “CDN” tab and click the custom domain of the resource created in Terraform.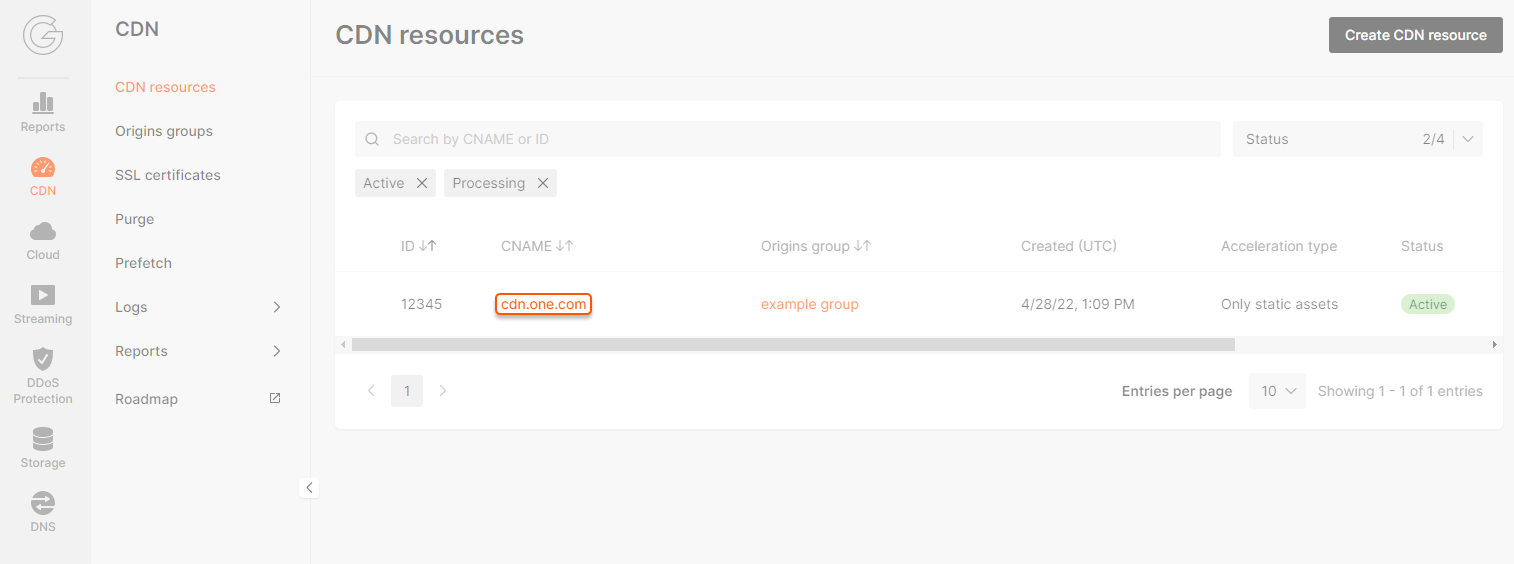
Configure CDN resource options
When you create a CDN resource via Terraform, it automatically adds the following options with default values:- browse_cache_settings — Browser Caching
- cors — CORS header support
- edge_cache_settings — CDN Caching
- gzip_on — GZip Compression
- host_header — Change Host Header
- ignore_query_string — Ignore Query String (Ignore All)
- query_params_blacklist — Ignore Query String (Ignore All Except)
- query_params_whitelist — Ignore Query String (Ignore Only)
- redirect_http_to_https — Enable HTTPS
- rewrite — Rewrite (request redirection)
- sni — Change SNI hostname
- static_request_headers — Response headers
- tls_versions — Supported TLS versions
- webp — WebP Compression
- websockets — WebSockets
Step 1. Update the configuration file
Open the main.tf file. It’s supposed to contain the code for the creation of your CDN resource.TipIf the main.tf file is missing, add the code according to the Create a new CDN resource section. Don’t worry, Terraform won’t duplicate a resource. It requires the code used for the creation of the resource only to identify a resource that should be changed.
Step 2. Provide the required options for GCore resources
Open the Terraform documentation for the Gcore provider and find the required option. Follow the guide from the Terraform documentation to enter the required option values.Step 3. Add custom values to the configuration
Add a curly bracket to a new string below:- 345600 seconds (4 days) is the caching time for responses with 200, 206, 301, and 302 codes
- 1000 seconds is the caching time for responses with a 403 code
- 50 seconds is the caching time for responses with a 404 code
options { string.
Step 4. Verify the updated configuration
The configuration file now contains the code that creates a CDN resource with your option values. Here’s an example of the file: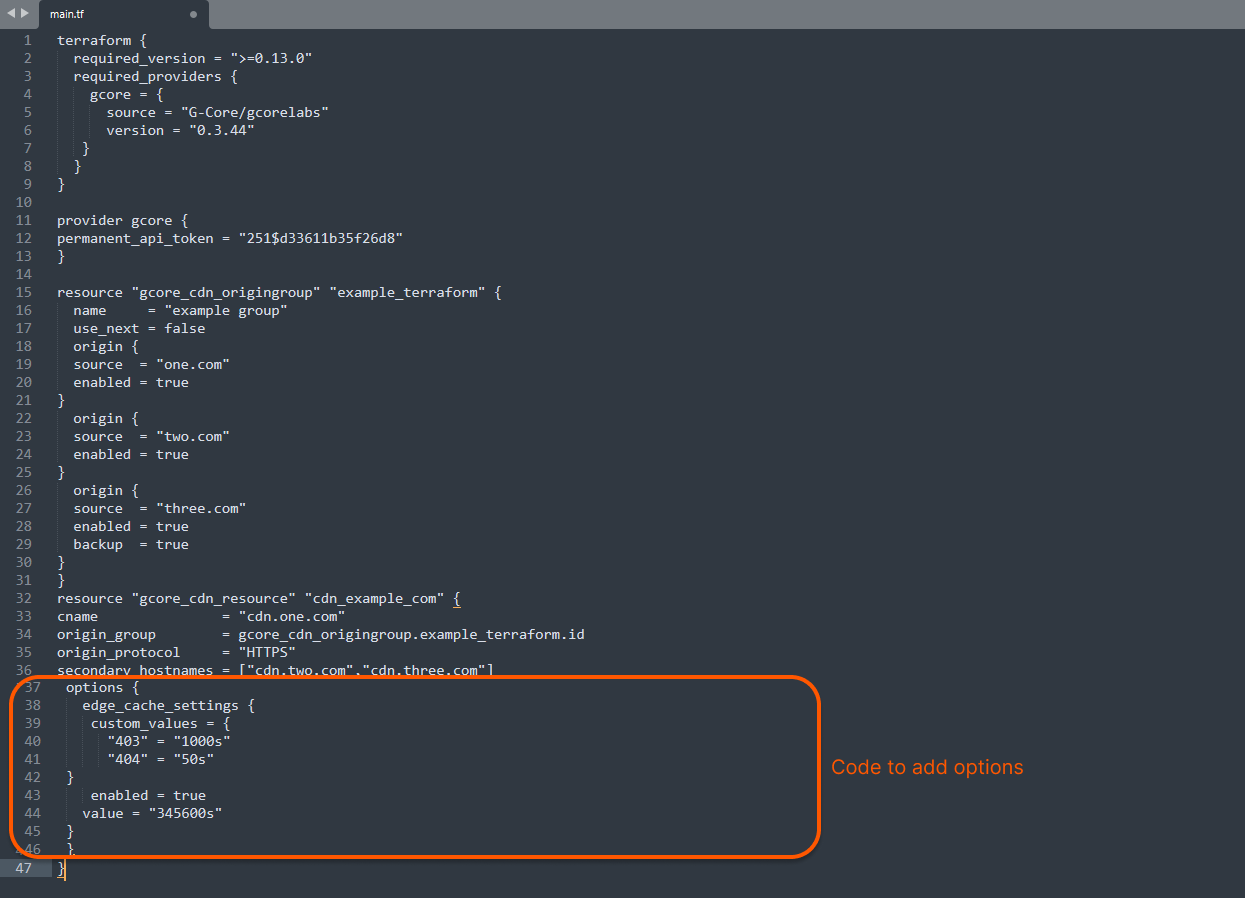
Step 5. Preview the updates
Access the “Terraform” folder in the command-line interface and run theterraform plan command — it will show what changes Terraform is going to make. If the code contains an error, the output will give a brief description of it.
Step 6. Apply the updates
Run theterraform apply command — it will make changes to the CDN. Terraform will ask you to confirm the action — enter “yes”.