Configure CDN caching
The CDN caching feature has two options: Origin controlled (enabled by default) and CDN controlled. You can choose one of them and set the caching time either in the origin server’s HTTP “Cache-Control” header or the CDN control panel.Origin controlled
1. Depending on your web server (Apache or Nginx), add the “Cache-Control” header with the max-age and public parameters to the .htaccess (for Apache) or nginx.conf (for Nginx) file. Here is an example of the Apache configuration where we have established that .gif and .ico files can be cached (the public parameter) and that they should be cached by CDN servers for 4 days (max-age=345600 in seconds):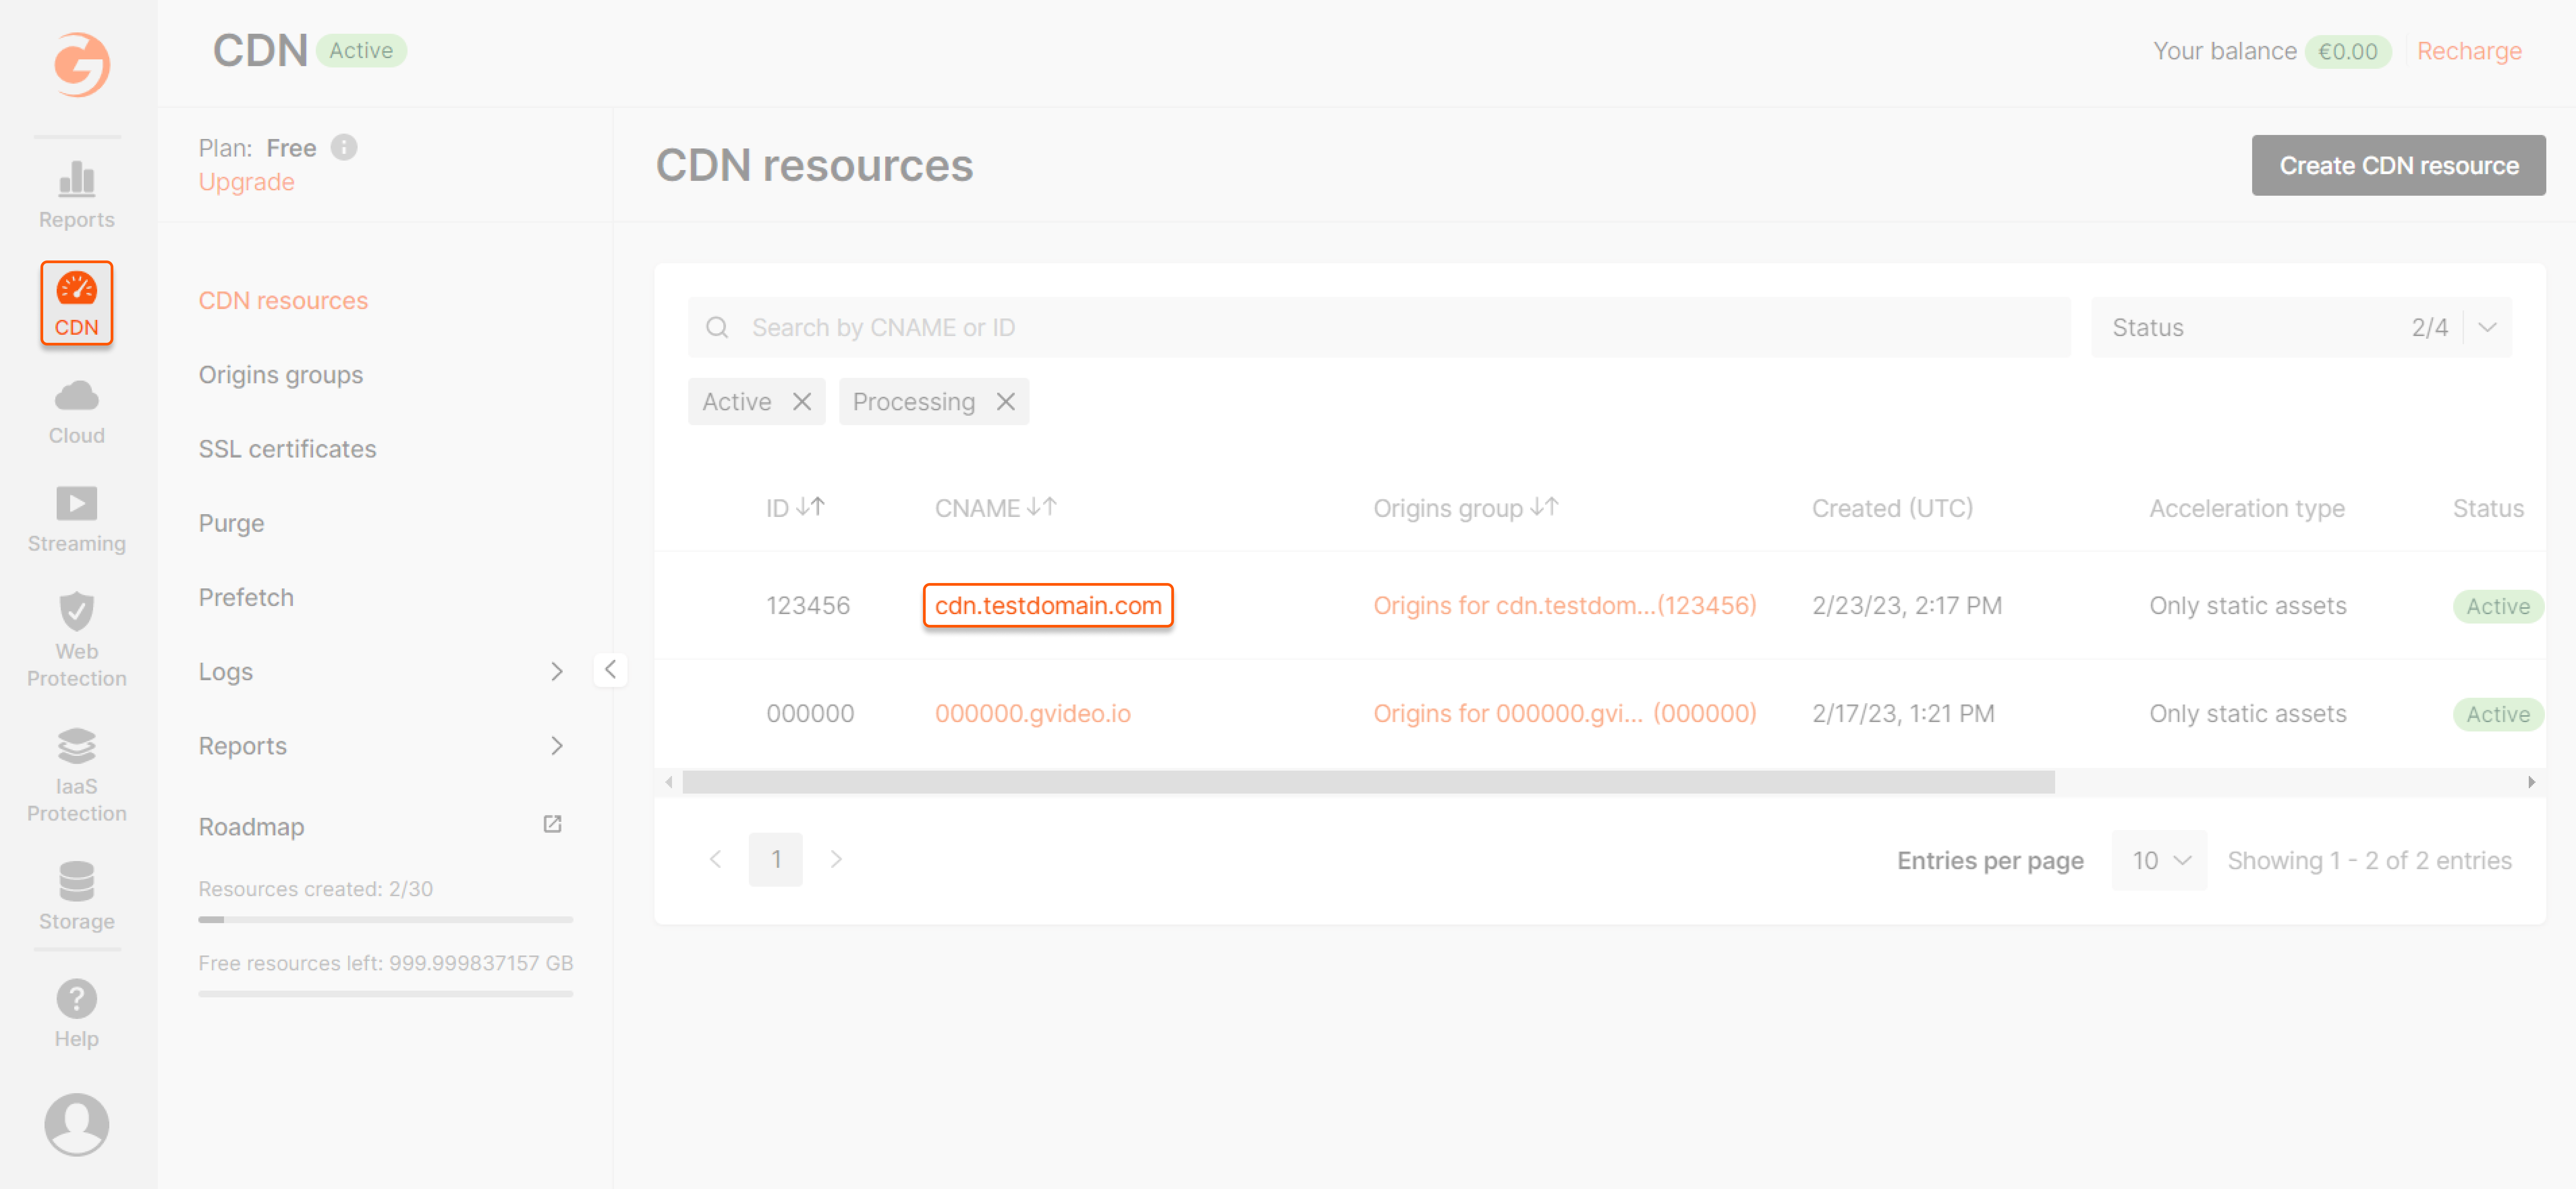
CDN controlled
You can configure CDN caching at two levels:- For the whole resource
- At the advanced caching rule level in the resource
1. In the Gcore Customer Portal, navigate to CDN.2. Find the resource for which you want to configure the CDN caching feature. Click the CNAME to open the resource settings.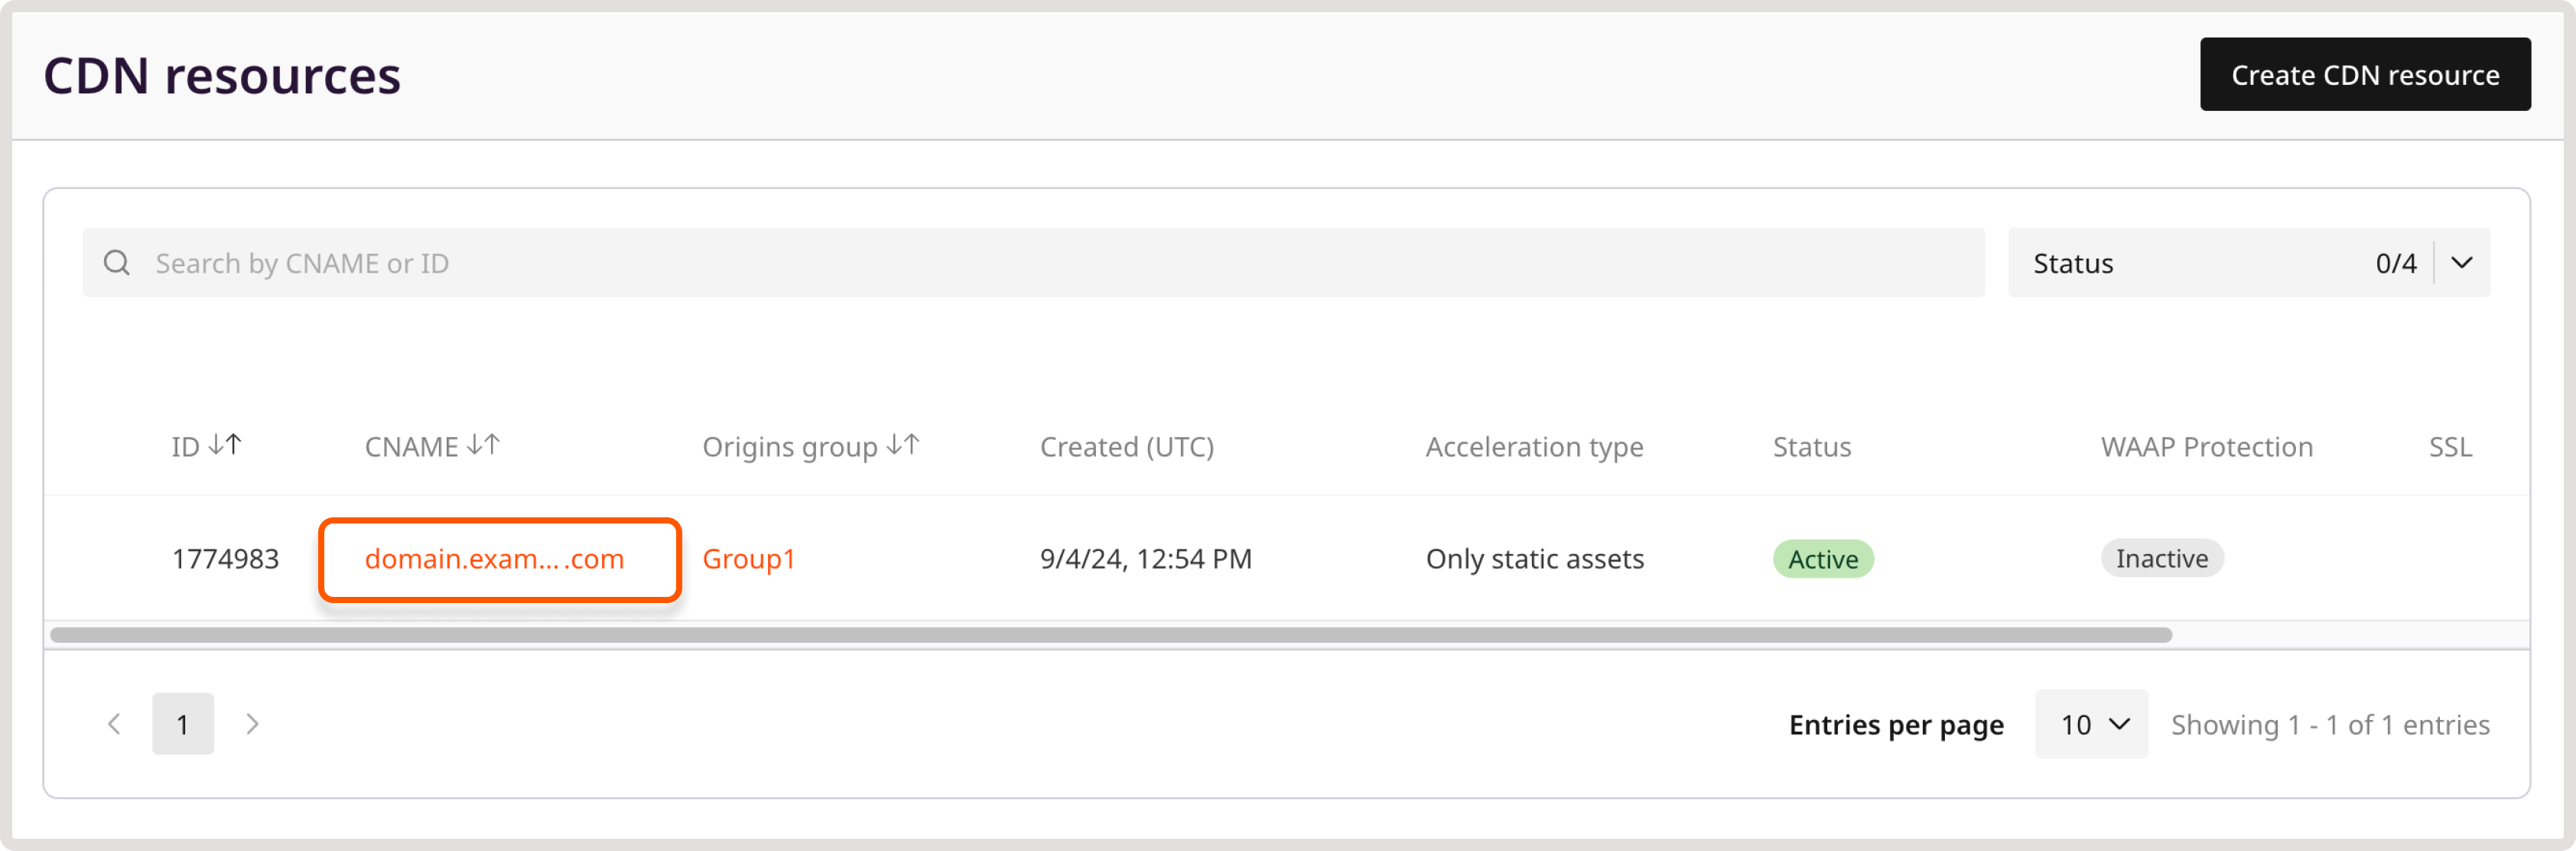 3. Open the Cache settings.
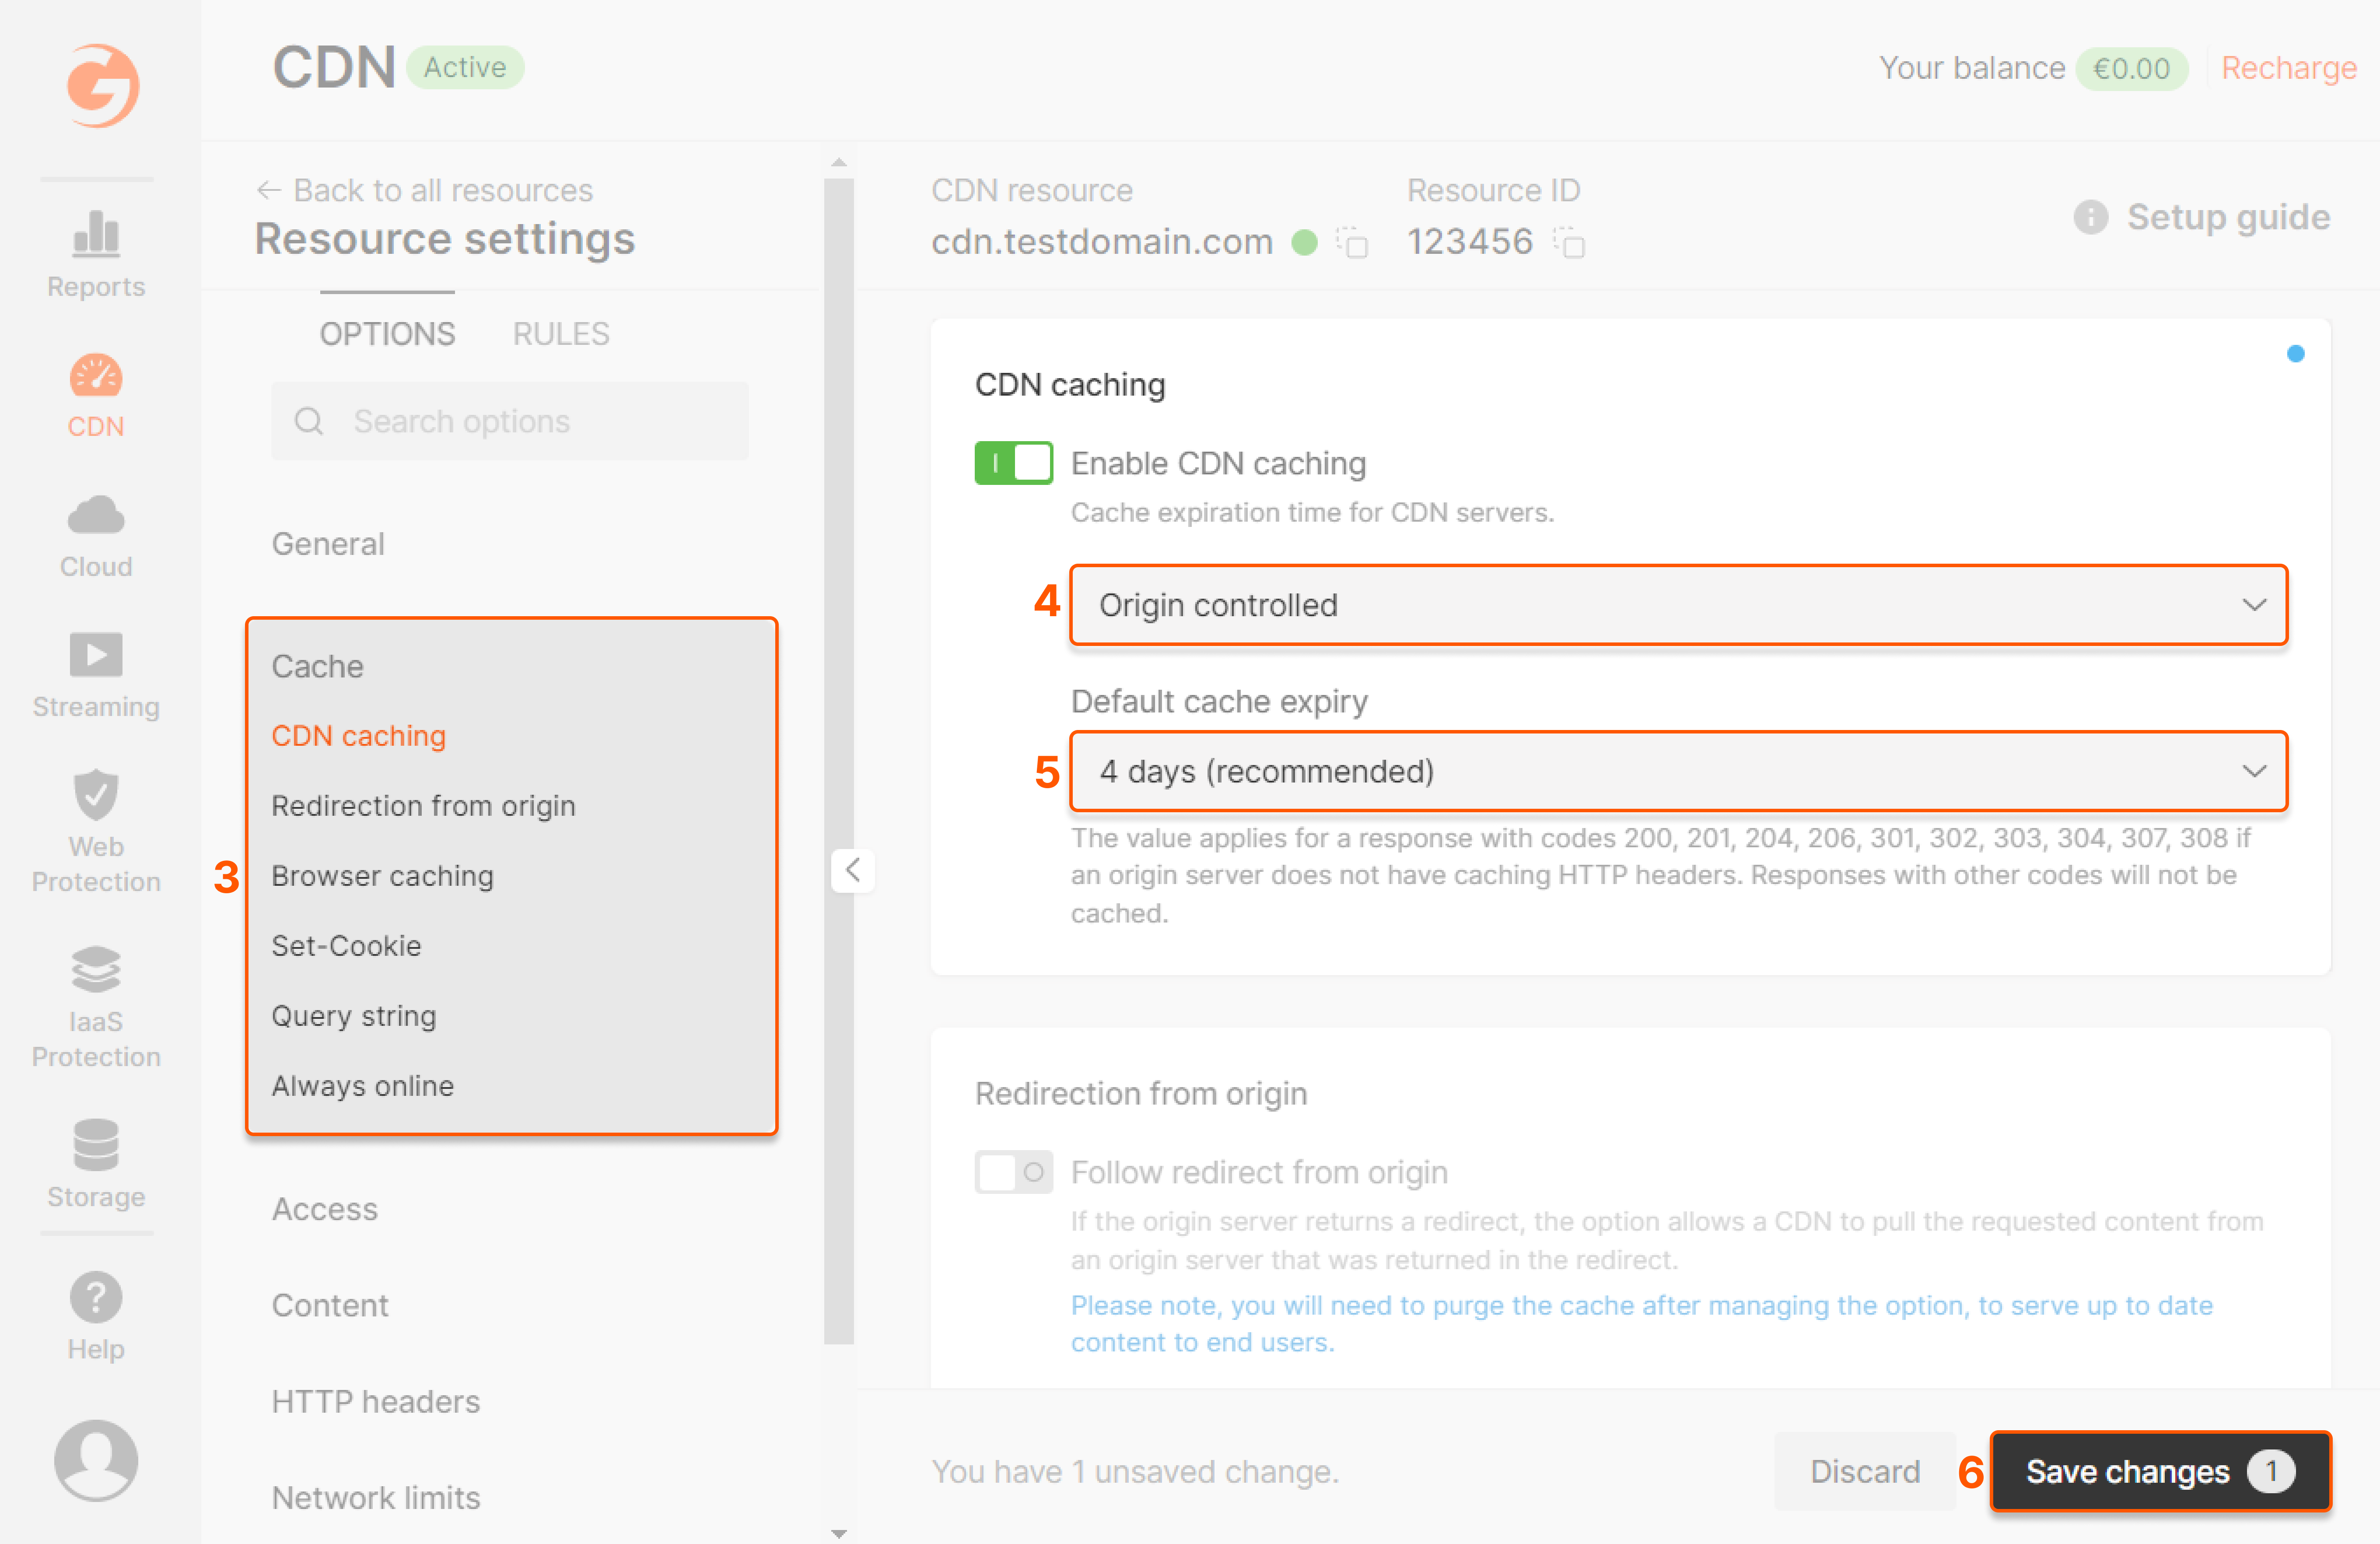
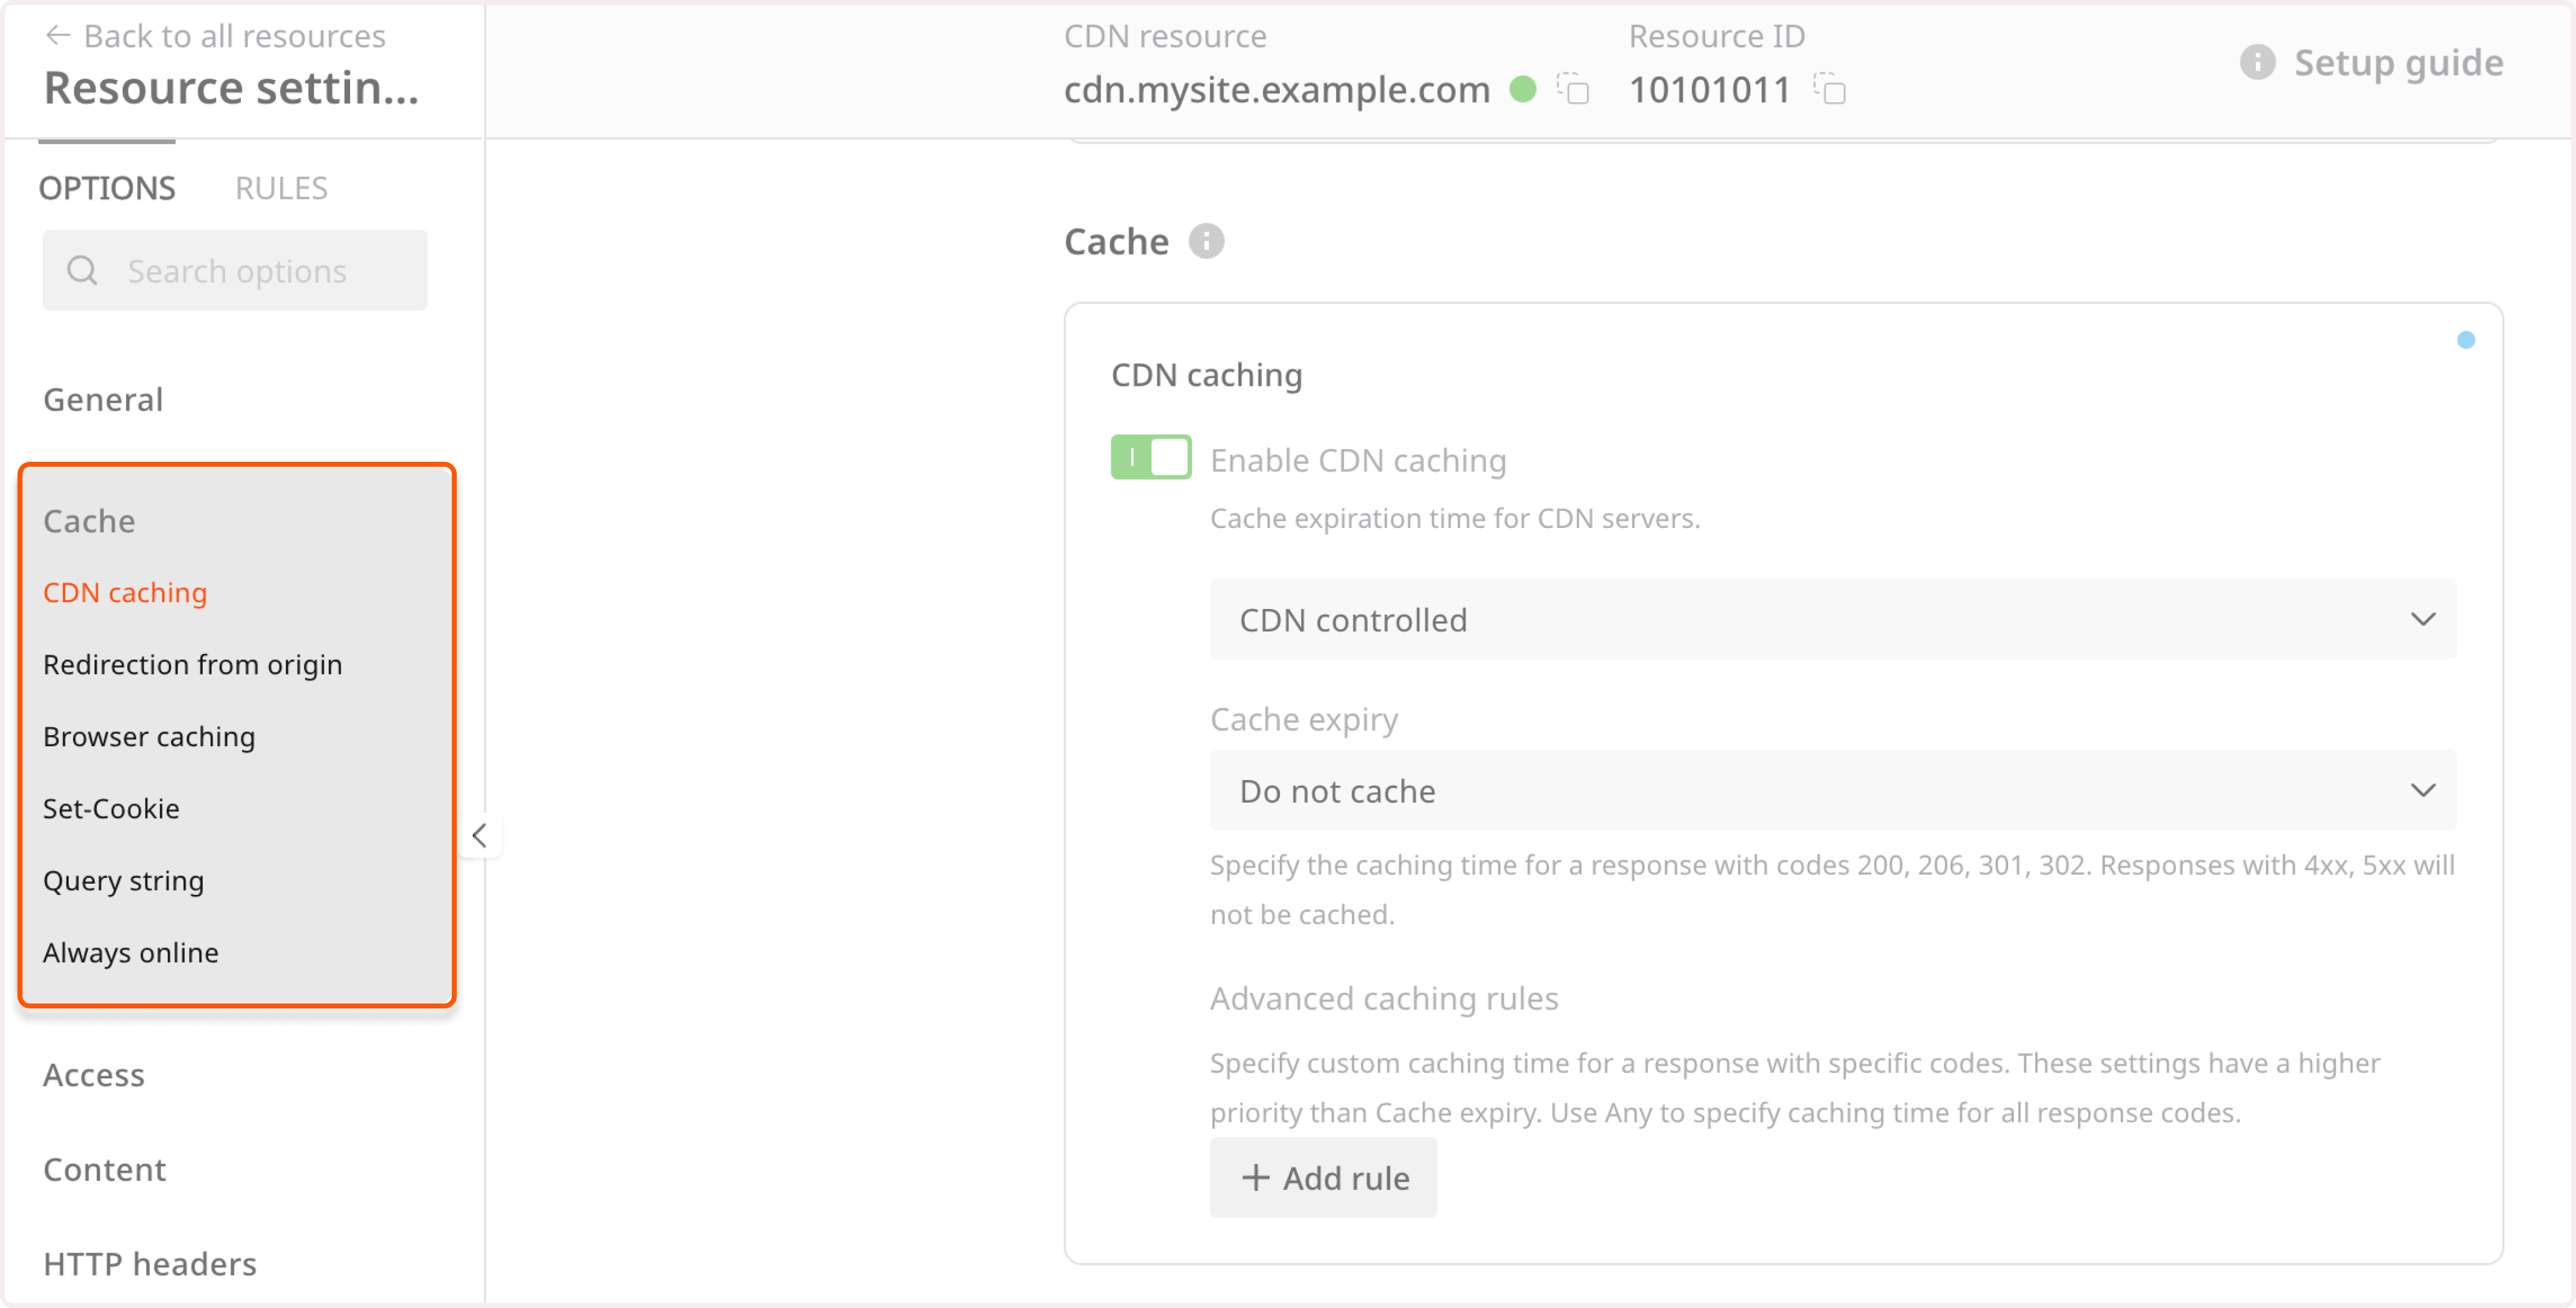 4. Make sure that the CDN caching is enabled. If not, click the Enable CDN caching toggle.5. Specify the caching timespan in the Cache expiry field. You can select the defined values from the list or choose Custom value and enter the preferred time in seconds.Note that this caching time will be applied for response codes 200, 206, 301, and 302. Responses with 4xx and 5xx will not be cached.6. (Optional) Set advanced caching rules if you want to set different caching times for specific responses. Check out the following section for instructions.
WarningIf you select Do not cache option, caching will be disabled even if the Enable CDN caching toggle is enabled.
Check CDN caching settings
Check through cURL
1. Open the terminal on macOS or command prompt (cmd) on Windows. 2. Run the following command:Check with DevTools in a browser
1. Open any internet browser (e.g., Google Chrome). 2. Go to your website. 3. Right-click and select Inspect to open the DevTools (Developer Toolbar). 4. Select the “Network” tab. 5. Refresh the page. 6. You will get a list of all files retrieved from your website. 7. Find any file (e.g., JPEG, PNG, IMG, CSS, etc.) integrated with the CDN and select it. 8. On the “Headers” tab on the right, you will see the configured headers. Analyze them using the description of the important headings below.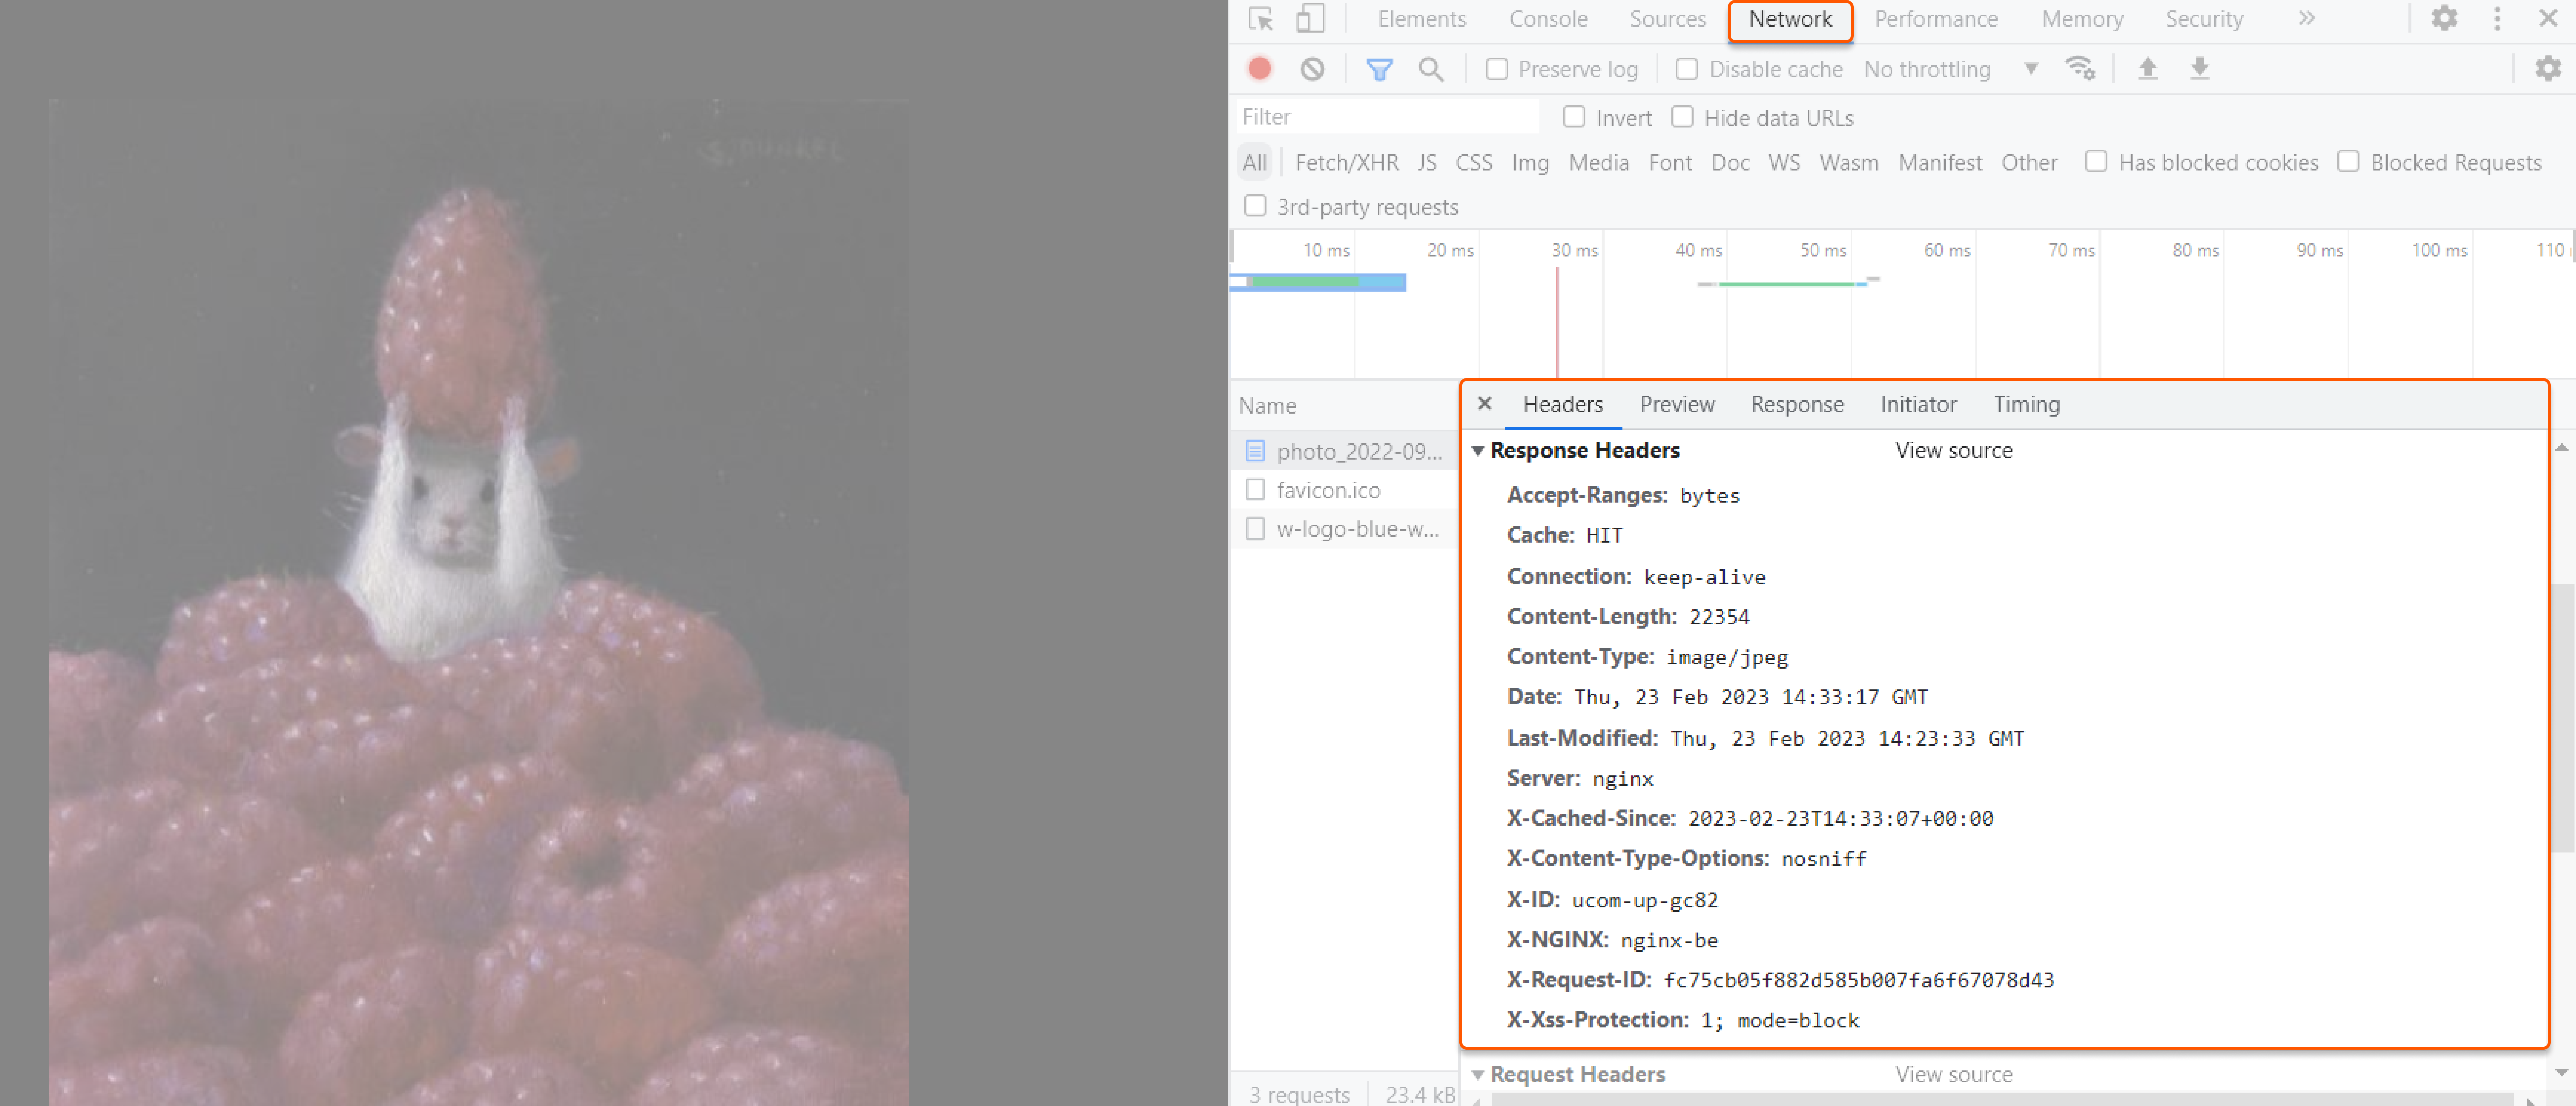
Check caching HTTP headers
There are several HTTP header parameters that help analyze the state of the cache:| HTTP header with parameters | Explanation |
|---|---|
| CACHE: HIT | The file has been delivered from the CDN. This parameter indicates that caching is working correctly. |
| CACHE: MISS | The file has been delivered from your origin server. Try to reload the page and clear the browser cache. If the value remains, it indicates something went wrong, and the file is not delivered from the cache. |
| X-ID: ab-cd-d123 | The file has been delivered from the Gcore CDN server with the identifier ab-cd-d123. |
| X-Cached-Since: 2023-02-23T14:33:07+00:00 | The time when the file was cached in the CDN server in UTC. |