What is a virtual IP address?
A virtual IP address (VIP) is an IP address that can be assigned to multiple Virtual Machines or serve as a secondary IP address for a network interface.How does it work?
To use a VIP to create a fault-tolerant system, you’ll need to install and configure Keepalived, which is a system daemon for Linux. Keepalived uses the Virtual Router Redundancy Protocol (VRRP) to manage the VIP. This protocol allows multiple machines to share a common IP address, and Keepalived uses VRRP to pass the VIP address between the primary machine and the backup machines. When the primary machine fails, the VRRP protocol detects the failure and passes the VIP to one of the backup machines, ensuring that the network service remains available. To use a VIP as a secondary address for a network interface, you will reserve a VIP and assign it to a Virtual Machine, first in the settings of our system, then in the settings of the machine. As a result, the VIP becomes the address of the Virtual Machine, working in conjunction with its regular IP address, allowing the machine to receive and transmit data on behalf of both addresses.Billing
A VIP is billed from the moment you reserve it until the moment you delete it. For example, if you reserve an IP address and then delete it after an hour, you will be charged only for an hour of use, regardless of whether the address was assigned to the Virtual Machine or not. The monthly price is displayed in the order window.Public IP limits
A Virtual Machine has only one public interface, meaning it receives a Public IP from the public network. It also supports multiple Floating IPs from private networks, but quotas limit the number. In a multi-network setup, each subnet can have one Floating IP. Within a single network, multiple subnets can exist, and each subnet of a single machine (VM/BM) is allowed one Floating IP. By default, Bare Metal servers support up to six attached IPs. A dedicated Bare Metal network removes this limit, allowing unlimited IPs per machine. Unlike standard networks, this type of network lacks port security and can be allocated by request.Create a virtual IP address
1. In the Cloud menu, go to Networking → Reserved IPs and click Reserve new IP.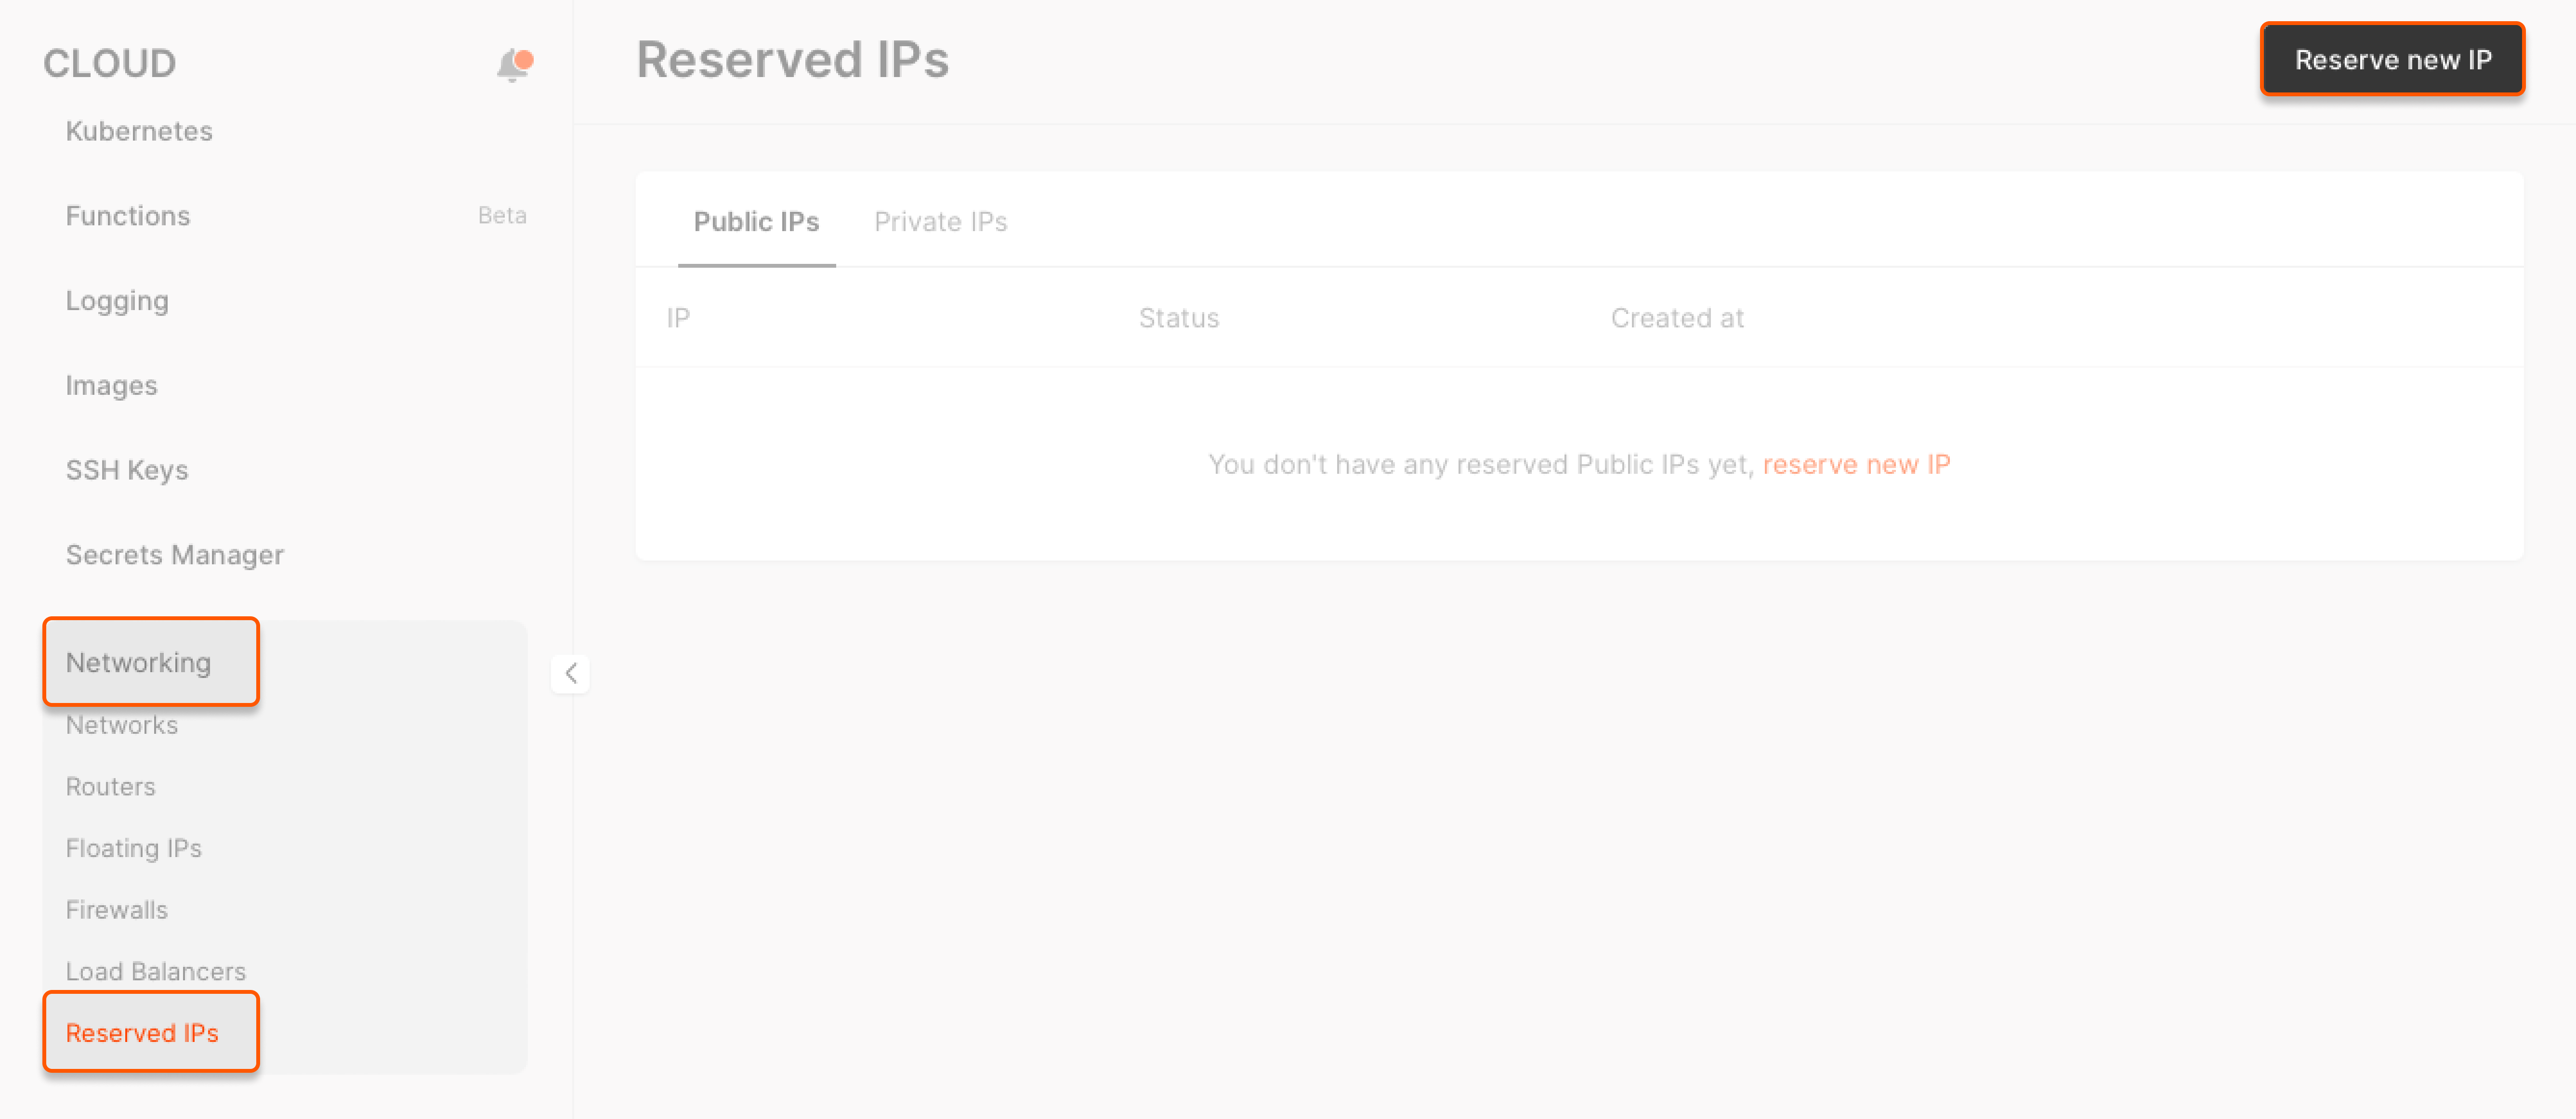
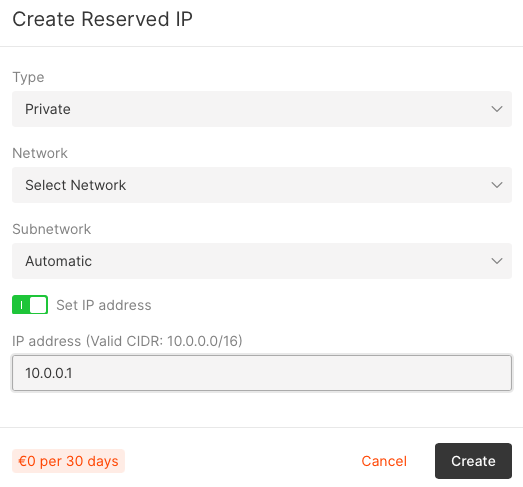
You have reserved a virtual IP address. You can now assign it multiple machines to create a fault-tolerant system or to add as a secondary address for your network interface.
Assign a virtual IP address to multiple VMs
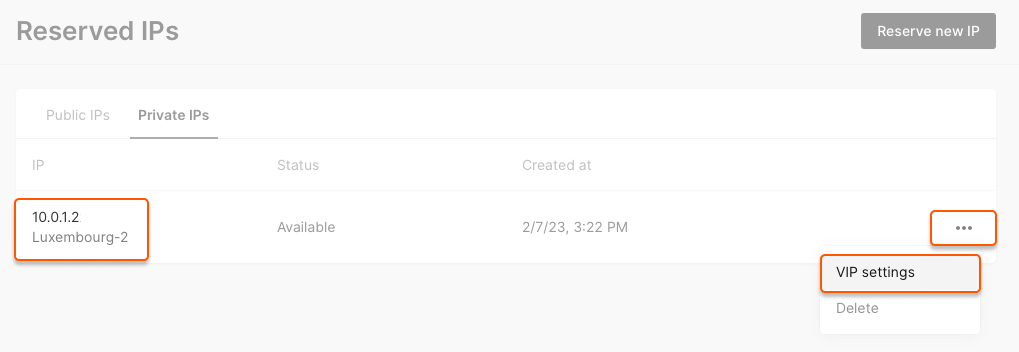
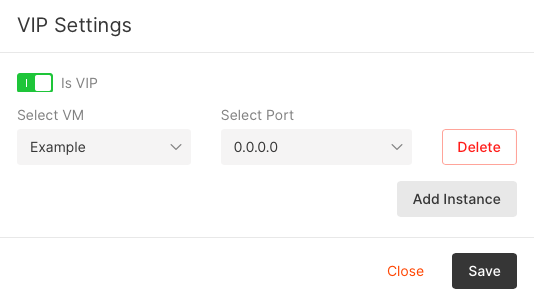
1. In the Cloud menu, go to Networking → Reserved IPs, find the required virtual IP address, click VIP in the Status column.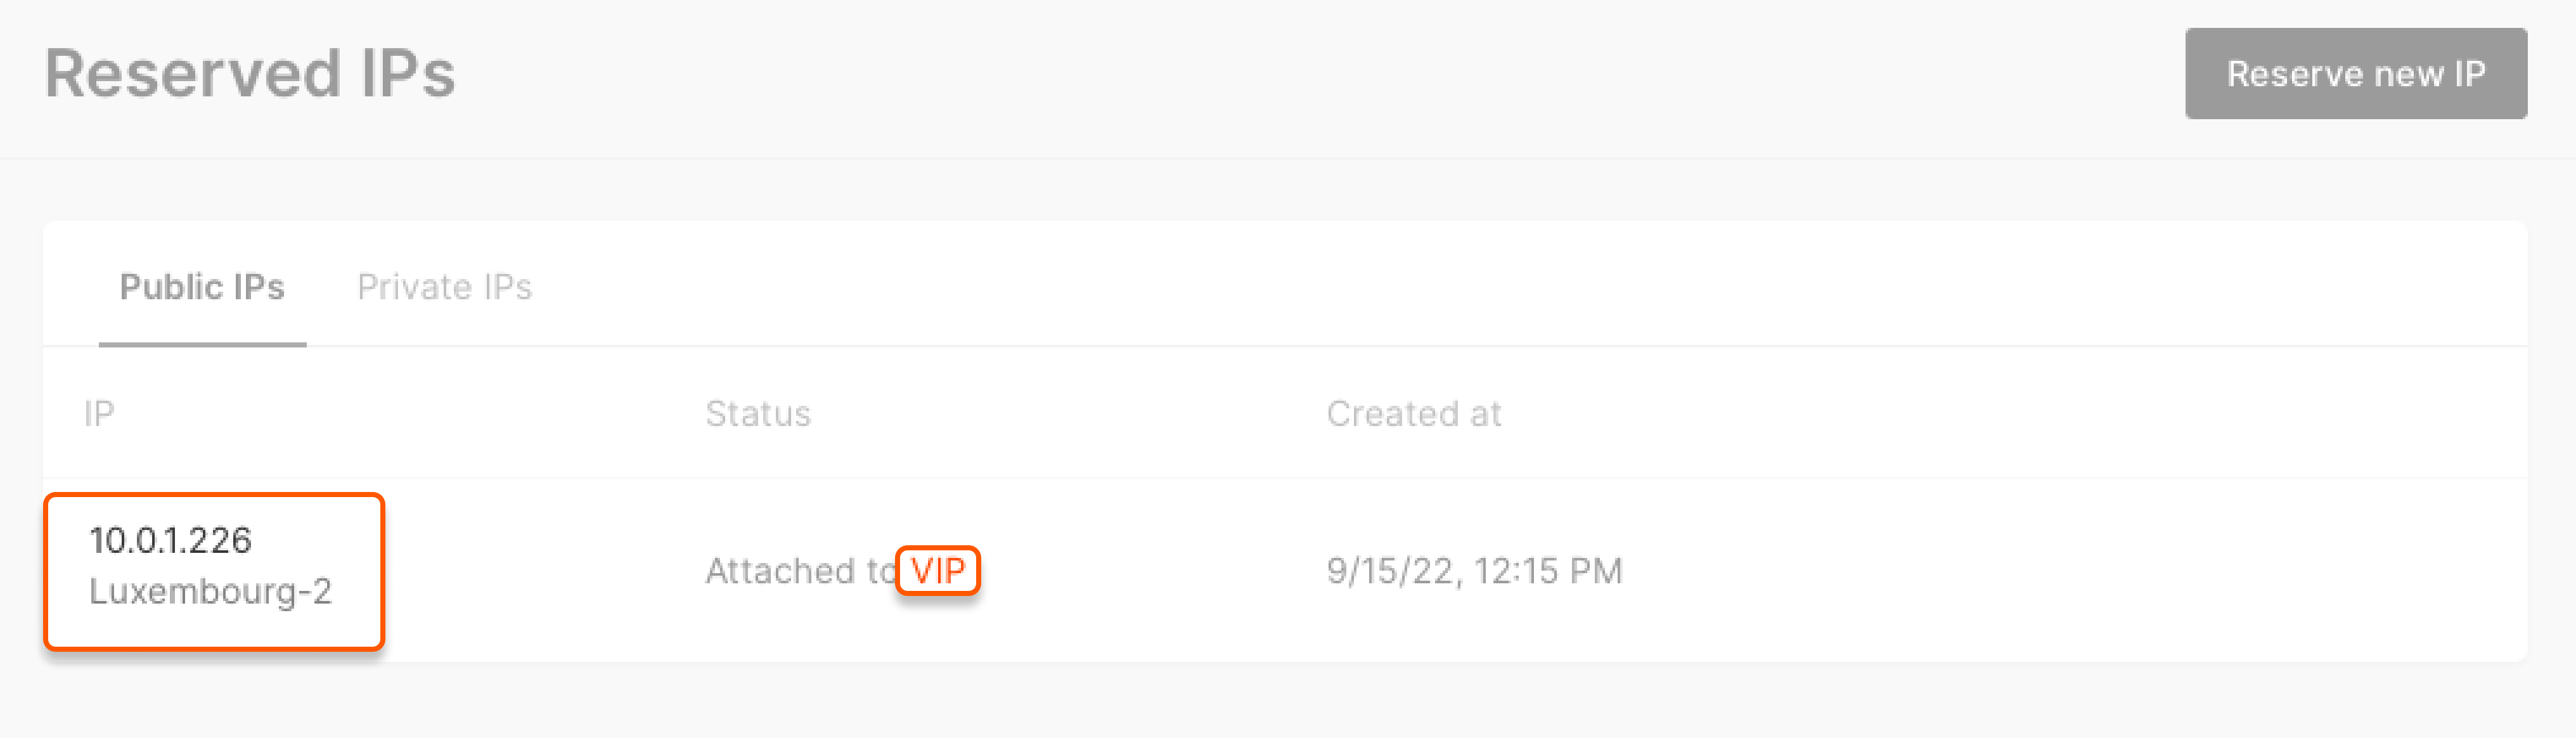
Assign a virtual IP address as a secondary address
1. In the Cloud menu, go to Networking → Reserved IPs, find the required virtual IP address, click VIP in the Status column.Configure a virtual IP address for non-Windows Virtual Machines
1. Connect to your Virtual Machine. 2. Run the following command as an administrator:- [VIP] is the virtual IP address that you want to add to the interface.
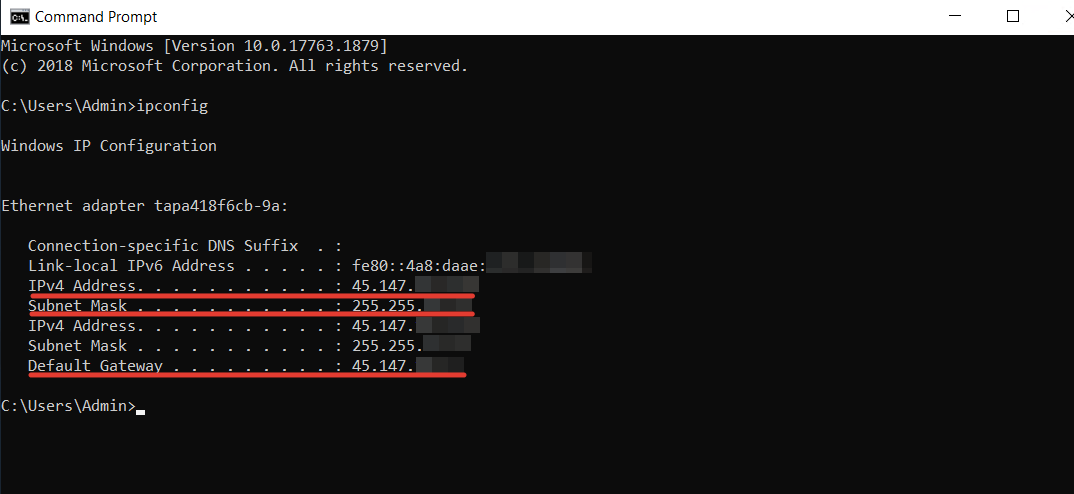
- [mask] is the subnet mask associated with the virtual IP address. You can find it in the Networking tab of your Virtual Machine.
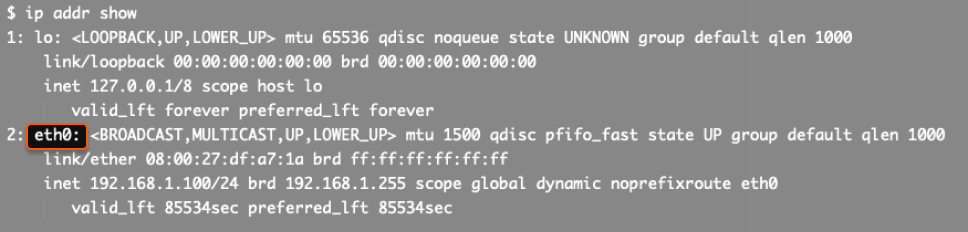
- [interface name] is the name of the network interface where the IP address will be added. To find the name, run the command:

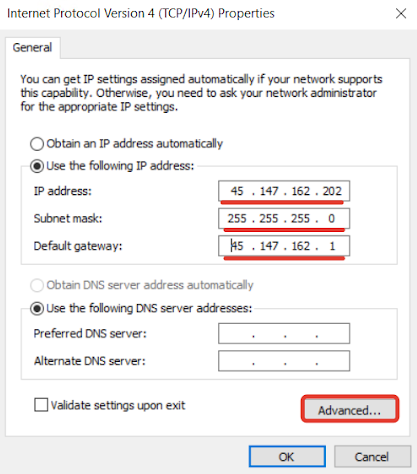
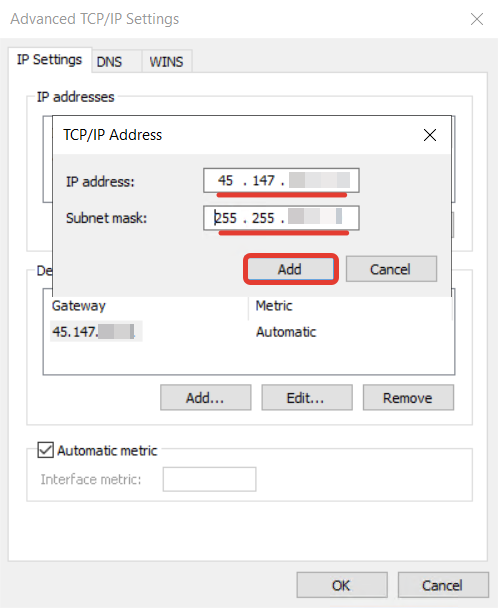
Configure a virtual IP address for Windows Virtual Machines
1. Open the Control Panel.2. Go to the Network and Sharing Center.
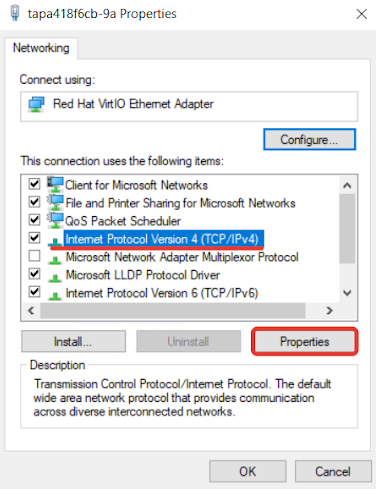
3. Right-click the active network connection that you want to add the virtual IP address to and select Properties.
4. Select Internet Protocol Version 4 (TCP/IPv4) and click Properties.